
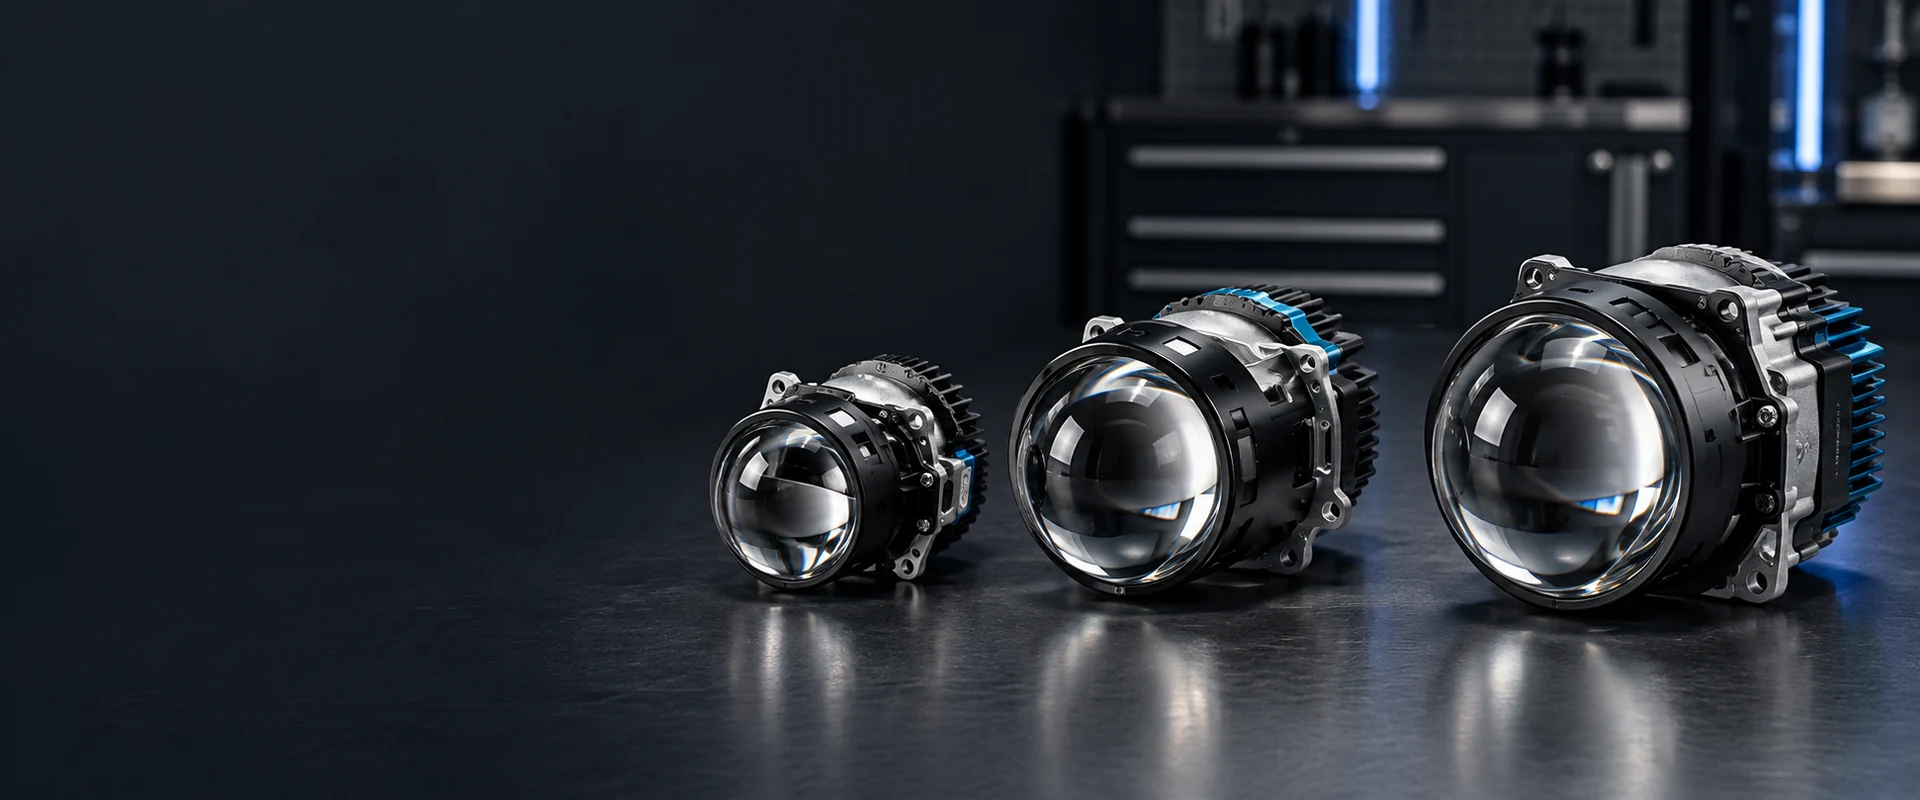
TECHNICAL GUIDES · LED PROJECTOR LENS
2 Inch vs 2.5 Inch vs 3 Inch LED Projector Lens: How to Choose?
Compare lens diameter, complete module dimensions, beam performance and housing fitment before choosing your retrofit projector.
October 8, 2026 · 10 min read
Choosing an LED projector lens is not simply a choice between three diameters. The nominal size is a starting point; a successful installation also depends on module depth, body shape, mounting method, cooling space and the internal structure of the headlamp.
This guide helps automotive lighting distributors, wholesale buyers, aftermarket brands, retrofit installers and vehicle lighting solution providers compare 2-inch, 2.5-inch and 3-inch options without treating lens size as a performance ranking. Vehicle fitment must be verified for the exact module and housing.
LED Projector Lens Sizes
QUICK GUIDE
What Does LED Projector Lens Size Actually Mean?
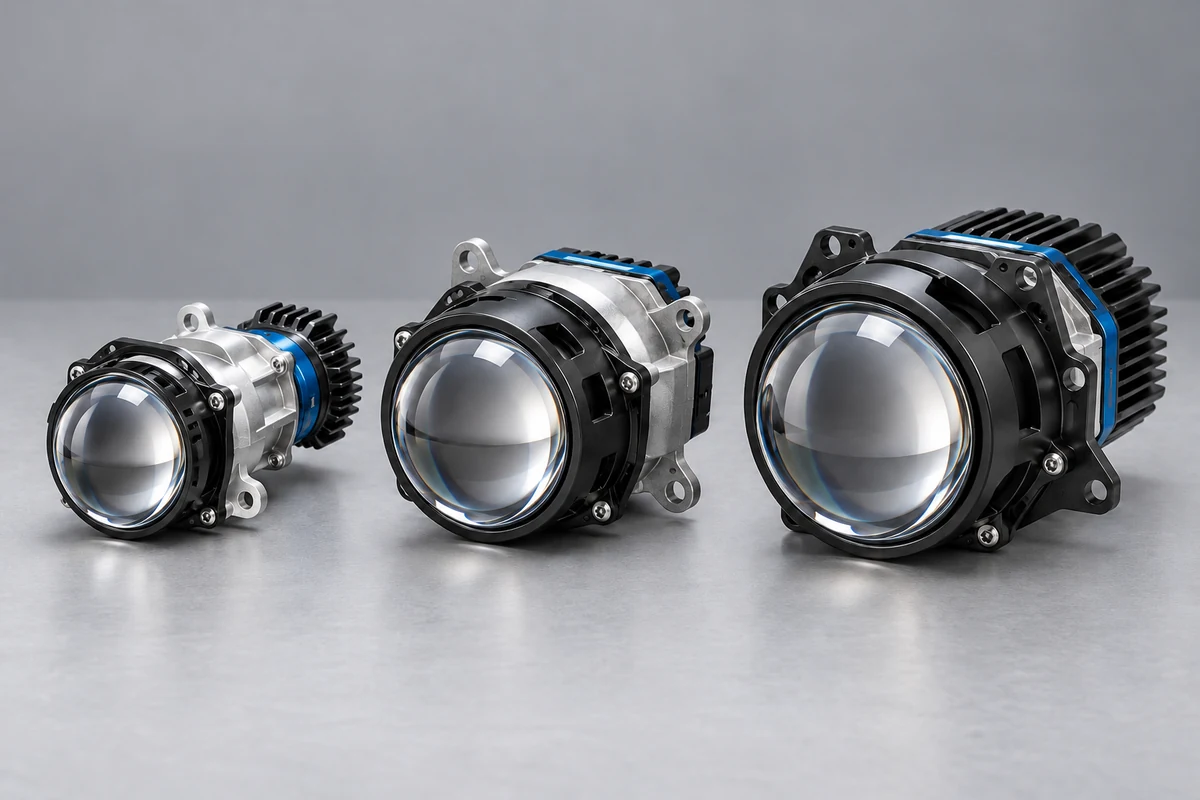
Nominal 2-inch, 2.5-inch and 3-inch sizes usually describe the front projector lens diameter. They are useful product identifiers, but they do not describe the complete assembly. Ask the manufacturer whether its size label refers to the outside lens diameter, clear optical aperture or another reference dimension.
Using 25.4 millimeters per inch, 2 inches converts to 50.8 mm, 2.5 inches to 63.5 mm and 3 inches to 76.2 mm. These are unit conversions, not measurements of a particular product. Lens retainers, reflectors, mounting ears, heat sinks and drivers can extend beyond the nominal lens envelope.
Lens diameter ≠ complete projector module dimensions. Two modules with the same lens size can have different lengths, widths, heights and mounting systems. Compare dimensioned drawings for the exact model and revision. A smaller lens can still sit in a deep assembly, while a carefully packaged larger lens may have a relatively short body.
Quick Comparison: 2 Inch vs 2.5 Inch vs 3 Inch LED Projector Lens
Use this table as a packaging guide, not an optical performance ranking or a vehicle compatibility guarantee. Every option requires a model-specific drawing and a trial installation.
| Feature | 2-Inch Projector | 2.5-Inch Projector | 3-Inch Projector |
|---|---|---|---|
| Nominal Lens Diameter | 2 in ≈ 50.8 mm | 2.5 in ≈ 63.5 mm | 3 in ≈ 76.2 mm |
| Typical Packaging Considerations | Smaller front optic; body may still be deep | Intermediate front optic; compare full envelope | Larger front optic; check surrounding trim |
| Module Depth | Model-specific; request drawing | Model-specific; request drawing | Model-specific; request drawing |
| Housing Clearance | Verify front, sides and rear | Verify front, sides and rear | Verify front, sides and rear |
| Mounting Requirements | Confirm mounting points and bracket | Confirm mounting points and bracket | Confirm mounting points and bracket |
| Shroud Compatibility | Match exact retainer and shroud | Match exact retainer and shroud | Match exact retainer and shroud |
| Thermal Clearance | Follow specific cooling requirements | Follow specific cooling requirements | Follow specific cooling requirements |
| Common Application Scenarios | Selected compact or motorcycle projects | Selected space-constrained automotive projects | Selected larger-opening retrofit projects |
| Fitment Verification | Drawing + sample + housing check | Drawing + sample + housing check | Drawing + sample + housing check |
Diameter values above are approximate unit conversions, not product measurements. Application examples do not guarantee compatibility.
2-Inch LED Projectors: Compact Applications
A 2-inch lens can be worth evaluating when the available front opening is restricted or the design calls for a compact visible optic. Potential projects include selected motorcycle headlamps, auxiliary assemblies and tightly packaged automotive retrofits. These are application scenarios, not proof of fitment.
Check the complete body rather than assuming the small front lens means a short module. Rear cooling hardware, a high-beam mechanism and cable exits may occupy the space saved at the front. Confirm that the mounting arrangement allows stable aiming without stressing the reflector or housing.
For distributors, compact products can address a specific installation need, but sample evaluation should still cover beam distribution, heat management and service access. Do not trade adequate clearance or optical suitability for appearance alone.
2.5-Inch LED Projectors: Balancing Size and Space
A 2.5-inch projector provides an intermediate nominal lens diameter. It may be a useful candidate when a larger front optic is difficult to package, yet the project permits more space than a compact lens arrangement. Its suitability depends on the actual assembly, not its position between two size labels.
Compare the installed envelope with both alternatives. An adapter plate or bulky shroud can erase a packaging advantage, and a rear fan or connector may set the required depth. Obtain the lens-to-mounting-plane dimension so the optic can be positioned correctly inside the headlamp.
For aftermarket brands, evaluate whether this specific module meets the intended low-beam and high-beam requirements under operating temperature. There is no universal percentage relationship between 2.5-inch and 3-inch optical performance.
3-Inch LED Projectors: Larger Optical Packages
A 3-inch lens creates a larger front optical package and may suit headlamps with sufficient opening and surrounding clearance. It is commonly considered for custom automotive retrofit projects, but neither a large vehicle nor a spacious-looking headlamp guarantees compatibility.
The wider front lens and matching shroud may conflict with internal trim, an indicator compartment or the outer cover. At the rear, the heat sink and mounting structure can remain the limiting dimensions. Verify both the front envelope and the space behind the mounting plane.
A larger lens gives the optical designer a different design envelope; it does not automatically create the widest beam, highest lux or best visibility. Select a tested module that meets the project requirements and can be mounted and aimed properly.
Does a Larger Projector Lens Produce a Better Beam?
Larger lens ≠ automatically better beam performance. Beam distribution results from the complete optical system: LED source position, reflector geometry, lens design, cutoff mechanism and their alignment. Drive conditions and thermal control also influence sustained output. Lens size alone cannot establish an optical ranking.
Compare low-beam width, useful forward intensity, foreground balance, uniformity and light above the cutoff. For bi-LED modules, assess high-beam distribution as well. A sharp-looking cutoff in a photograph does not guarantee zero glare; installation angle, aiming, optical tolerances and the surrounding headlamp matter.
Request photometric results with the supply voltage, test distance, measurement locations, stabilization time and operating conditions. Beam photographs are helpful when exposure, distance and aim are consistent, but differently exposed images do not provide a reliable brightness comparison. Avoid choosing a module from a single peak lux value without considering the rest of the distribution.
How to Measure Headlight Housing Clearance
Begin with the exact vehicle, model year, market version and headlamp part number. Different trims can use different internal structures. Inspect the intended housing directly; dimensions from a similar-looking assembly are not sufficient.
Identify the proposed mounting plane and optical centerline. Measure forward to the inner headlamp cover and rearward to the nearest obstruction, including the rear cap when installed. Record the usable width and height at several depths because the housing may taper.
Check obstacles such as reflector walls, adjuster mechanisms, internal trim, wiring and adjacent lighting compartments. Allow the headlamp aiming mechanism to move through its required range. A module that clears at one static position may interfere after adjustment.
Use a dimensionally accurate template or sample module to check the entire installed envelope. Add the bracket, shroud, connectors, driver and cable bend space. Confirm the manufacturer’s cooling clearances rather than applying an arbitrary universal gap. Record measurements and photographs before committing to a batch.
Mounting Brackets, Shrouds and Thermal Clearance
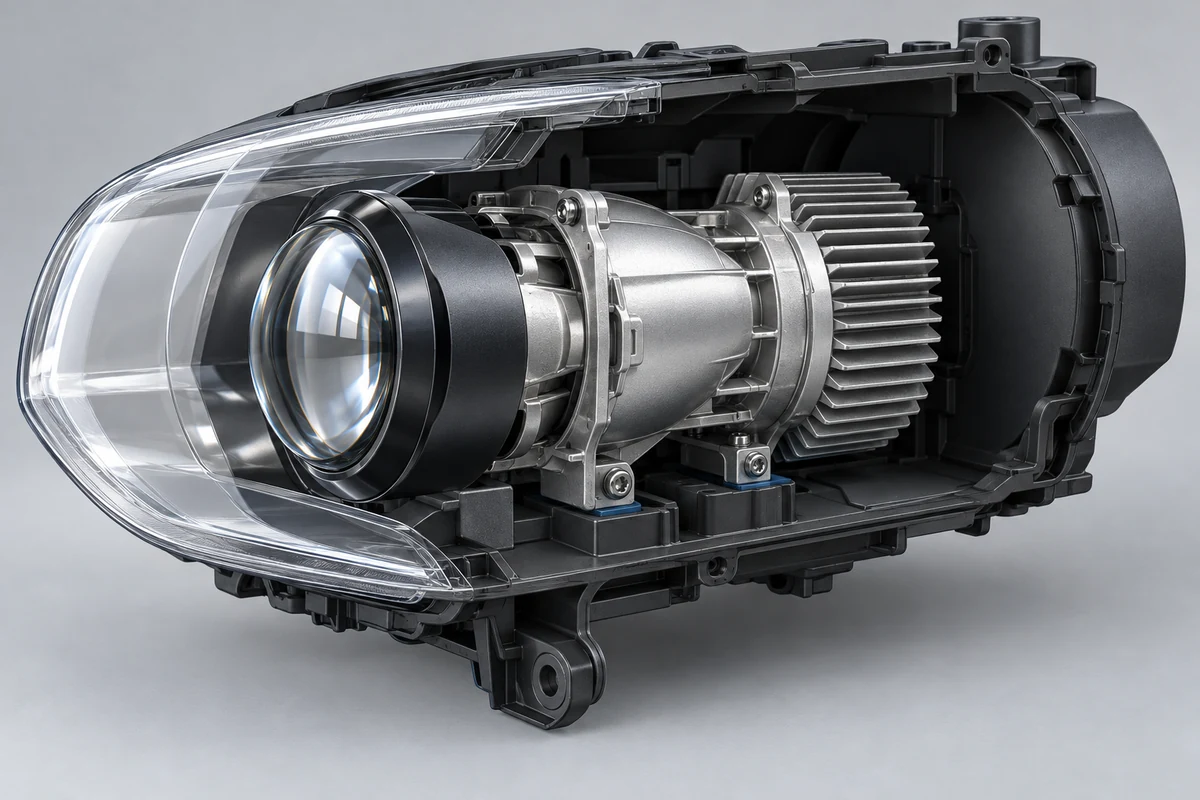
A bracket must match the module mounting points and the headlamp structure. Confirm hole spacing, fastener specification, mounting-plane offset and the ability to set the correct aim and cutoff orientation. A bracket described as universal still requires application-specific verification.
Shrouds are trim components, not fitment guarantees. Check the attachment method, internal opening, overall outside diameter and depth. The shroud must clear the lens retainer and housing cover without obstructing the beam, cooling path or moving parts. A nominal size label does not establish cross-brand compatibility.
Cooling designs vary. Some modules use a fan, while others rely on passive heat sinks or other thermal arrangements. Keep required airflow paths open and follow the manufacturer’s installation limits. Provide space for driver packaging and strain relief, and confirm that the rear cover can close without crushing cables.
After a trial assembly, verify sealing, headlamp adjustment and operation under representative conditions. If the project requires irreversible housing changes, have a qualified installer assess structural support and weather protection before proceeding.
How to Choose the Right Size for Your Application
Start with the installation constraints and optical task. Define the target vehicle or headlamp family, required beam distribution, supply system and intended operating environment. Then shortlist exact module models across any size that can plausibly fit.
For retrofit installers, a secure mount, correct optical position and reliable service access are central. For vehicle lighting solution providers, repeatable assembly and thermal validation matter alongside optical results. For aftermarket brands, consider how the complete kit will be installed, documented and supported.
Wholesale buyers should segment the range by verified applications rather than labeling one size as suitable for all vehicles. Approve samples in representative housings and keep fitment records tied to product revisions. A change to the heat sink, connector or bracket can affect an already tested installation.
For road use, confirm the locally applicable requirements and the certification or approval of the specific product and installation. Do not assume that a certified component makes every modified headlamp legal. For more background topics, visit our automotive lighting technical guides.
Buyer Checklist for Distributors and Retrofitters
Before requesting a quotation or placing a wholesale order, give the manufacturer enough information to check the exact module and application. Use the following checklist to keep purchasing and installation teams aligned.
- Dimensions: model and revision, module length, maximum width and height, and a dimensioned drawing.
- Mounting: mounting points, bracket drawing, optical-center position, adjustment method and fasteners.
- Clearance: rear space, shroud envelope, cooling requirements, wiring and driver packaging, and headlamp geometry.
- Optical evidence: low-beam and high-beam distribution, test conditions, traffic-side configuration and applicable certification documents.
- Electrical and thermal requirements: supply range, power demand, connector pinout, control functions and operating limits.
- Purchasing controls: approved samples, kit contents, quality checks, batch traceability, warranty terms and notification of design changes.
Share housing photographs and measured constraints, then ask the manufacturer to identify what remains unverified. Agree on acceptance criteria before ordering. A sample approval for one housing should not be presented as proof for every vehicle in the same category.
Frequently Asked Questions
Is a 3-inch LED projector brighter than a 2.5-inch projector?
Not necessarily. Compare measured beam distribution and sustained output for the exact models under equivalent test conditions. LED source, optical design, drive current and thermal behavior all matter; lens diameter does not guarantee a brightness advantage.
Can a 3-inch projector fit in any headlight housing?
No. The lens, body, bracket, shroud and cooling assembly must clear the specific housing and cover. Verify the complete installed envelope, aiming movement and rear-cap space before selecting a module.
What does the projector lens diameter actually measure?
It usually refers to the front lens size, rather than the complete projector assembly. Confirm the manufacturer’s measurement definition, since outside diameter and clear optical aperture may differ. Use the drawing for actual module dimensions.
Are 2-inch projectors suitable for motorcycle headlights?
Some may be suitable for selected motorcycle applications. Check the exact headlamp geometry, mounting structure, electrical supply, beam requirements and applicable road-use rules. A compact lens label alone does not verify motorcycle compatibility.
Can I use a 3-inch shroud with a 2.5-inch projector?
Only if the specific shroud and attachment system are confirmed compatible, including any required adapter. Check the inner opening, mounting interface, outer envelope and depth. Do not assume compatibility from nominal lens sizes.
What measurements are needed before ordering a retrofit projector?
Provide module length, maximum width and height, mounting-point dimensions and available front and rear clearance. Also document cooling requirements, shroud space, wiring and driver packaging, housing geometry and aiming travel. Compare these with the exact manufacturer drawing.
Which projector lens size is best for wholesale buyers?
There is no single best size for every market. Build the range around verified customer applications, installation constraints and tested optical requirements. Request samples, technical documentation and revision control before approving volume purchases.
Conclusion
Choosing between 2-inch, 2.5-inch and 3-inch LED projector lenses starts with nominal lens diameter and ends with a verified complete installation. Compare the actual module envelope, mounting system, shroud and cooling requirements alongside documented beam performance.
The right option is the specific module that meets your application requirements and fits with proper clearance and aiming. Review available LED projector lens modules, request dimensioned drawings and approve a sample before scaling up.
Need the Right LED Projector Lens for Your Application?
Tell NVEL your vehicle application, available installation space and optical performance requirements. Our team can help review available module dimensions, mounting compatibility and OEM / ODM options. Final fitment requires verification of the specific module and headlamp housing.